Wednesday, April 17, 2013

Sous Vide: Epazote 1

Like many bloggers I'm always in the market for good ideas.  A friend of mine recently posted a comment on Facebook that her "weakness in the kitchen isn't with flavors and balance as much as it is with what temps and the "right" ways to cook varying meats to get the right reactions".

She was seeking help on getting "
the sear without drying things out, to get things moist without having them just be entropic and crock-pot-y."

Challenge accepted.

There are SO many components
that play roles in reducing (or adding to) the crock-pot-yness of a dish that it's understandable why so many people give up and learn to live with blah. What cut of meat do I use? Should I marinate or brine? Do I add fat and if so, when? What are the cooking times and at what temp? Should we just go out to eat instead?  These are all questions that need answers and ones that contribute to the finish of any dish regardless of the cooking method employed. There is one overarching technique however that stands alone in its consistently moist, easy to pull off, error-free, and no-holds-barred guarantee in hearing the magical, "holy crap, that doesn't taste like it came out of a crock pot" from your dining companions.  Sous vide.

When I started this blog I told myself that I would never cover sous vide cooking in any detail.  Don't get me wrong, this technique is probably the most revolutionary cooking method right after the microwave oven, but is just now starting to be adopted by the general public.  It's the one technique that I use probably more than any other, not just for its consistent outcome but also for its ridiculously easy setup, and lack of monitoring with perfect results every time. That being said, it's also one of the most heavily blogged about of the Modernist cooking techniques and therefore one I didn't feel was apropos for a blog that aims to introduce readers to "new things". 

That being said my friend had a problem and I had a solution. Surely there was a way I could find a compromise to satisfy both of our "needs".  The easy route would have been to tell her to buy a Polyscience immersion circulator ($799), an ARY chamber vac ($999), a leg of lamb ($30), some "weird" ingredient she could find at an ethnic grocery ($cheap), throw them all together in a vacuum sealed bag, set it in a water bath at 134F (26.5C) for 10-48 hours and eat. Blog post, DONE! 
 

Sure the blog would be done, but rather pointless. I knew it was highly unlikely my friend would actually buy any of the pricey gear I just mentioned but more importantly, even if she would have purchased the gamut, I've yet to set up Google AdSense on my website to get the "kickbacks" these purchases would bring, making it a no-gain post for me. In light of zero income generation possibilities I decided to take the more time consuming, "high road" and develop a cheaper, but equally delicious, home recipe that would introduce any readers still in the dark not only to the concept of sous vide cooking but one that also showcased an awesome "new" ingredient for my blog (gotta stick to the rules). I also wanted something that could easily be prepared at home with no capital (and very little time) investment.....at least until I get my readership high enough to justify that Google AdSense thing and cash-in on those culinary equipment kickbacks.

Cooking method, check. The only remaining questions were what 'new' ingredient I was going to feature and what other foods were going to take a warm bath with it? There's a decent little Mexican market near my house that seemed like the perfect place to find an accomplice to join me in my sous vide adventure. I wasn't expecting to discover any unique, Mexican specialties here such as escamoles (ant larvae) or chapulines (grasshoppers) and even if I had, I'm pretty sure that cooking them long and slow in a bag wouldn't be the ideal method of bringing out their best.  I was, however, certain that I'd find some interesting herbs, vegetables or at the very least, unique chiles that I could make work for this challenge.  After spending what seemed like an hour, and I'm sure to the bewildered shop keeper like a day, looking, smelling, and when the owner would turn her head to sell a Mexican Calling Card, tasting various components that looked promising, I landed on fresh Epazote.

Epazote is a Mexcian herb that I put in the Cilantro league. Also known by the alluring names Wormseed, Stinkweed or West Indian Goosefoot (by no means to be confused with East Indian Goosefoot) Epazote,
has nothing taxonomically in common with Cilantro. I lump these two together because like Cilantro, Epazote is a food that some people adore while others can't even stand being in the same time zone with.

 Epazote Leaves

Personally I love the powerful taste that seems to change over the course of chewing but admit it can be a frustratingly 'tip of your tongue' kind of flavor. You're certain you know what it tastes like but just can't quite think of the word. I've heard the flavor compared to parsley, celery, anise, tarragon, root beer, creosote, turpentine and gasoline.  All correct answers but all wrong too. It's not that all of these differnet flavors are competing with each other at the same time but more that your head keeps jumping around thinking it's one flavor and then the next second that it's something else.  Total herbal mind F%k.

In Mexico, Epazote is frequently used in bean dishes, moles and stews.  The symbiotic pairing with beans is due the legumes mellowing prowess on Epazote's strong flavor AND Epazote's role as a carminative (gas reducer) on the beans. Simply adding a finely chopped handful of this herb to any standard out-of-the-can bean dish can bring a new dimension (and less flatulence) to an otherwise boring side. No sous vide required. 

 Epazote and Beans -You complete me XOXO

My mission: to incorporate Epazote in a dish that A: used sous vide as the primary cooking method while keeping the process practical for the average home cook, B: didn't overpower the headline ingredient (whatever that was going to be) with the taste of creosote, and C: didn't hide the unique taste of the herb either.

As for the main ingredient I knew that red meat, particularly tough cuts such as short rib or shoulder were out of the question for this job.  Preparing these types of cuts are where sous vide cooking really shines, but unfortunately inappropriate for this challenge because of the exceptionally long cooking times required.  Even though I was confident my friend wasn't willing to shell out nearly two grand on new kitchen equipment, I was absolutely positive she wasn't game for sitting in front of her 'peasant' stove for 72 hours monitoring the temperature of a pot of water.  This had to be quick.  

A lot of people wonder why cooking times need to be so long for certain cuts of meat.  Does it really take 3 days to heat up spare ribs in a water bath? In a nutshell, no.  Depending on its thickness, most cuts of meat prepared sous vide will be fully cooked in several hours. Fully cooked yes, tender and unlike the crock pot crap we're trying to avoid in the first place? No. The seemingly excessive times some meats need to spend at a held temperature is what breaks down the collagen within the meat.  Over time the collagen fibers are converted to gelatin and in the process the meat acquires a melt in your mouth texture impossible to achieve by any other method. As an added bonus the meat is held within a sealed bag during the entire process, preventing  moisture from evaporating or dripping away. These long cooking times can be sped up to some degree by increasing the temperature of the bath, but with the negative effect of contracting to collagen TOO quickly and wringing additional moisture from the meat. While this wouldn't necessarily dry the meat to crock-potty levels it certainly isn't a good idea and one we will avoid all together for this post.


Collagen Breakdown
Short animation I created showing the breakdown of collagen and moisture loss at different cooking temperatures and times.


Seafood, on the other hand, can also be cooked precisely with sous vide and in MUCH shorter periods of time. Cooking fish perfectly would only require my friend to periodically monitor the temperature of her water bath for about 25 minutes.  In a society that on average watches 34 hours of television per week, 28 of which seemingly involves a Kardashian, "sacrificing" half an hour to make a restaurant quality meal seemed like a reasonable request.    


Cooking Method Comparison
Short animation I created that shows the difference in thermal transfer between sous vide and conduction cooking methods.


salmon sous vide, epazote, pinto bean foam, tomatillo salsa, salmon skin chip


Prepare brine
Mix together

2 cups water
4TB Salt
2TB Sugar


Submerge salmon in brine and chill for 1 hour.  Brining will firm the flesh as well as remove the albumin.  Albumin doesn't effect the taste of the dish but it will congeal during cooking and make that white gunky stuff you may have seen on cooked salmon before.


Place brined salmon in a Zip Lock bag.  With the bag still unsealed, dunk in water as far down as possible  without allowing any water to breach the top. The pressure of the water will force the majority of air from the bag (displacement) and THEN zip the bag shut. 


Prepare the sous vide bath and monitor temperature to maintain 140F. If the temperature goes above your target, reduce the heat slightly or/add additional cold water. If the temperature falls below your target...duh...turn up the heat.  


Cook sous vide at 140F for 25 minutes, maintaining target temperature as accurately as practical.

 Pinto Bean Foam


Combine in pressure cooker

3/4 cup (150g) dry pinto beans
1 2/3 cup (400g) water
2 1/4 tsp (10g) lard
 

Pressure cook for 1 hour at 15psi (High if using an electric model)

Blend until smooth


Rough chop Epazote

Add 1/2 cup (100g) of heavy cream to blended beans.  Reheat and add chopped epazote and salt to taste.


Place mixture in whipping siphon and charge with 3 cartridges of nitrous oxide.


tomatillo, epazote salsa

Husk and rinse tomatillos. Place on baking sheet.


Place tomatillos under the broiler until charred (about 5 minutes per side)

Blend roasted tomatillos and salt to taste

Add fresh chopped epazote.

finish

The only caveat to sous vide cooking is keeping in mind that foods will not "brown" in the bag (or in kitchen-talk, no Maillard Reaction) Fortunately there's a simple fix.  Heat a pan on high and add a small amount of high temperature oil such as peanut.  Sear the salmon, skin side down until crisp and brown.

Add a dollop of pinto bean foam to plate

Portion salmon and place next to pinto foam. Top with tomatillo, epazote salsa and additional fried salmon skin for texture.  Serve with remaining salsa on side for any hard core epazote fans.


Tuesday, April 9, 2013

I Like it La Lot

One of the ways I love to play with flavors is with infusion and compression techniques.

I've seen several well-done accounts recently that demonstrate insta-pickling and the suspension of liquid into foods using a heavy vacuum so rather than repeat a blog post that's already been done I thought I'd take different approach and use my 3D animation background to show a "behind the scenes" look of what's actually happening at the cellular level


Waking up on Monday with compression in my head, I rushed out of the house for a quick stop at my local Mekong Market, a virtual treasure trove of "new" foods for me to work with. The compression technique does a bang up job on many foods, provided they have a porous structure and although I had a few ideas of items I might try, I was excited to see what other vegetable mysteries the Mekong Market had to offer.

Upon entering the store I made a bee-line for the Bac Ha, known in English as Taro Stem. Although called Taro Stem, this vegetable is not the stalk of the two-finger/three-finger tuber that tastes like glue.  Bac Ha IS in the same family as its pasty cousin, but it's almost always the shoot of this plant which is eaten and not the root (or in taro-talk the 'corn').  I've eaten Bac Ha many times before, typically as a crunchy add-in to Asian soups, and I remembered it as being one of the most porous vegetables I could think of.....on second thought, maybe TOO porous.  I needed a backup
.

bac ha, taro stem
 bac ha

In case compressing the Bac Ha was a bust I also purchased a handful of Yampi, a cool, albeit pancreatic looking root, a can of pomegranate drink, a Fuji apple, some lemongrass, hot basil, and a handful of la lot.  Once home I quickly discovered online that the yampi is a type of Caribbean Yam that I knew would most likely be too dense for compression (another blog?).

yampi, caribbean yam
 yampi

Still hoping to get my initial ingredient to work, I grabbed a stalk of Bac Ha and retired to my office to eat it, contemplate complimentary flavors to infuse it with, and begin the process of writing down my tasting notes.  Mid-way through my research, and about 6 inches into devouring the airy stalk I came across a website with this line:

"bac ha must be carefully cooked before consumption, or the plant can stimulate an adverse reaction.

The reaction is caused by raphides, crystals of calcium oxalate which form in the cells of the stalks and corms of the plant. The crystals take on a needle-like structure, which causes them to pierce mucus membranes, resulting in severe irritation to the consumer."


Oops.
 
In addition to my impending mucal distress, I now knew that Bac Ha was out of the running for my study. Compressed foods need to be prepared in their raw form as the membranes of plant cells are broken down during the cooking process leaving them unsuitable for infusion afterwards.  The need to "carefully cook" Bac Ha, or spend the remainder of my Monday with debilitating cramps and/or on the toilet meant I needed a third option.

This left me with lemongrass and la lotLemongrass is hardly what I would consider an "unusual food" and therefor out of the running for this post. When William Sonoma makes a dish soap that smells like you, you're pretty damn mainstream in my book. This left la lot.  La lot, also called betel leaf is, like the aforementioned taro stalk, another poorly named organic. La lot is often mistaken for the addictive, psycho-stimulating concoction called betel quid whose components are betel leaf, areca nut, slaked lime and sometimes tobacco. The two are often mistaken because in English, like the taro fiasco of earlier, they have the SAME NAME!?  The effects of the stimulant betel quid are often mild and comparable to a cup of coffee or, in the version with added tobacco, a cup of coffee and a cigarette (addiction multitasking). La lot is often sold in markets in the U.S. labeled as betel leaf but again, despite the SAME name as the leaf used in betel quid,  it is a completely different plant altogether.

It's rather common when traveling throughout Asia to see people chewing the stimulant (see: fun) "version" in everyday life. Even when not actively 'tripping', betel quid users are pretty easy to spot in a crowd as their teeth and gums are stained an insane red.

Pictures from a recent trip to Coorg, India

Disclaimer: I have no hard evidence that the man on the right has ever eaten, or even heard of la lot. The beaming whiteness of his sparkling teeth however suggest that if he ever HAS partaken of either of the leaves discussed in this post, the smart money would be on the la lot. The woman on the left however.....


The betel leaf sold in the fresh veggie isle of many Asian markets, and the one used in the application posted here however will not stain your teeth and gums, nor make you see god.  Although both the tasty and the feel-good varieties of these leaves are in the same Piper genus, they share about as much in common as spinach and beets which share the genus Chenopodiaceae; completely different plants in taste and shape and unfortunately, neither of which will make you high.

La lot has a very aromatic and somewhat peppery flavor that becomes even more pronounced when cooked.  I decided to pair (compress) this flavor into sliced apple where the sweetness of the fruit would complement the herbal bite.

la lot, thai chili, apple, mirasol chili, basil 

betel infusion

la lot leaves
la lot leaves - 40g

fish sauce, brown sugar, thai chilis, star anise
 fish sauce 20g
brown sugar 40g
thai chili x1
star anise x1

pomegranate juice drink
                                                         pomegranate juice drink - 100g

Blend all ingredients on high until fully liquid.  Proportions given are approximate and should be adjusted based on personal taste.

jouan cr 4 22 centrifuge

jouan cr 4 22 centrifuge
centrifuge

I ran the resulting liquid from step 1 in my centrifuge (because I have one) for about 20 minutes at 3800 RPMs to remove as many solids as possible before compression .  If for some odd reason you don't have a centrifuge at home you can most assuredly get a similar result with a strainer. If you don't have a strainer, buy one.

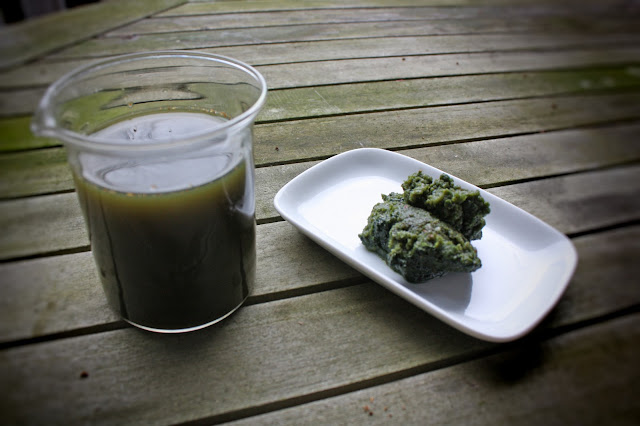
la lot infusion, pulp
la lot infusion liquid, pulp 

It's always a good idea when centrifuging (or straining) foods to taste all of the resulting layers separately before discarding.  Some really interesting flavors can be discovered this way from items that you may instinctively want to toss.  In the case of la lot I've already done the tasting for you. Ditch the pulp.

fuji apple
 fuji apple

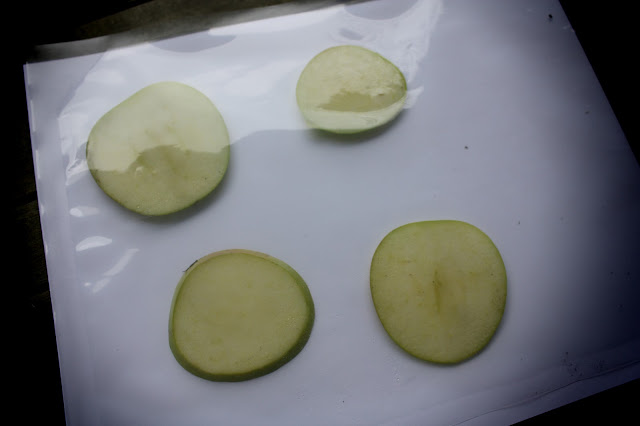
Cut apple into 1/4 inch slices and position them for compression.  Compression infusion can be done in a vacuum bag, which is then sealed in the chamber after the air is evacuated, or in an unsealable and open container, providing the food is submerged in liquid. Compression occurs when the cells of the food are disrupted by the vacuum process and then returned to atmospheric pressure, not by the collapse of the bag they're in. Because of the amount of vacuum required, compressing foods will not work in off the shelf 'Food Saver' systems that suck the air (and liquid) from the bag.  A chamber vac is needed for this process (a more than worthy investment that will pay for itself in keep-cheese-from-molding costs alone, or if you don't care about your cheese, check out this post on the website Cooking Issues for a fantastic and super inexpensive do-it-yourself alternative here).

Compression:  The Main Event


Spoiler Alert: If you haven't watched my above video on compression yet the following description gives away the plot, AND the ending. You have been warned.

Add the la lot liquid to the container with the apples and vacuum.  As this video shows, as the pressure inside the chamber vac decreases so does the boiling point.  The surrounding liquid begins to boil  even though no heat has been introduced.  On the cellular level the cells of the the apple start to swell.  The vacuoles inside of each cell also begin to grow and shift until, like an overinflated balloon, they pop.  These mini explosions leave voids inside each cell where the vacuole used to live. Once the chamber vac valve is released and the apple slices return to atmospheric pressure, a desperate land grab to occupy the empty vacuole space ensues. In this instance, instead of air being able to rush in to fill the void, la lot juice has moved in next door to the apples and is more than happy to take the space.  Result: perfectly infused fruit with a dense la lot and flavor.


la lot infused apple
 la lot infused apple

The now flavored apples were good on their own but by no means a dish I would serve to others. They needed something more.

apples on mesquite grill
 mesquite grill 

Sear infused apple slices on the grill. The natural sugar in the apples, as well as that added to the infused sauce will caramelize and contrast beautifully with the saltiness of the fish sauce and herbal flavor of the la lot


plated dish, served with chopped mirasol pepper, basil chiffonade
 plated dish
serve with finely chopped mirasol pepper and basil chiffonade


Tuesday, April 2, 2013

Mum's the Bird

Behold the Chrysanthemum, or 'Mums' as your syllabic-lazy friends may call it. Most people are familiar with the dried flower of this perennial in its tea form or its fresh flowers as a decorative touch to a fancy artisan salad, or possibly even as, according to strawberryreef.com, the identifying ass-tat on the Australian release of My Little Pony, "Chrysanthemum Birthflower" but in my opinion the lesser known (at least in the West) green stems and leaves of this plant is where all the action is.

            My Little Chrysanthemum Birthflower Pony                                                                                Chrysanthemum Leaves


This slightly grassy flavored green can be found in almost any local Asian market but due to its unfamiliar leaf shape it's often passed up by the uninitiated for more familiar territory. Don't let this happen to you.

The taste of chrysanthemum is surprisingly fresh with a slightly nutty base (think of that top-of-the-palate nuttiness you get with a super-fresh carrot and not the 'pepper nuttiness' like you find in arugula) and has the same, light perfume quality as the tea you may already be familiar with. Depending on the market where you shop and more importantly whether or not they translate their produce signage to English, you may need to look for this vegetable labeled by its native name; Tong Hao (Chinese), Rau Tần Ô (Vietnamese) or Shungiku (Japanese). There won't be any other greens with the same leaf shape in the store so when in doubt just go with the visual and you're golden.

Traditionally this vegetable is steamed, boiled, added as a flavoring to soups or simply eaten raw. When eaten raw the thinner, young shoots are preferable as they impart less of the bitterness that, as with some people, comes with thickness and age. To cook them I could have prepped a traditional, miso based salad or just a simple saute with garlic and both would have been delicious. Because of the freshness of this particular bunch of chrysanthemum however, and the fact that it's been a stellar, sunny week in Seattle I was in the mood for, and really wanted to pair it with spice...so that's what I did.


chicken wing, nuoc mau, thai chili, chrysanthemum  

parboil chicken wings

Parboil wings
Parboil wings for 5-7 minutes and drain. If time permits, air-dry thoroughly on a rack in the refrigerator. This process removes some of the fat and helps separate the skin from the meat for an ultra-crispy finish.

dried chicken wings

Dried Wings

 Place wings on a rack, the rack over a sheet pan and bake at 425F (220C) for 45 minutes.  I know this sounds hot and long but trust me, this will be the most worthwhile hot and long thing you'll do all week.

thai chili, lemon

Diced Thai Chili, Lemon

Prepare

nuoc mau 

Nuoc Mau
 Nuoc Mau is just a fancy (and by 'fancy' I mean Vietnamese) word for caramel sauce. For this dish I finished the sauce with a squeeze of lemon, thai chili and several hefty dashes of  fish sauce.


crispy caramel chicken wings with chrysanthemum

Plated Dish
Toss the crispy wings in spicy caramel sauce from above and add several handfuls of chopped (1/4") chrysanthemum leaves.  The small leaves will quickly wilt and the syrupy sauce will perma-bond them to the surface of the wing. Finish the dish with larger, rough-cut fresh chrysanthemum leaves and stems for added flavor and crunch.